

1. Prepare your GIS
Lets get our GIS ready so that our attribute table has all the fields to be displayed on the map. Make 2 columns in GIS for latitude and longitude (if they are not already there). Then estimate the center point for each project, filling in the latitude and longitude columns.
*Note: The projection should be NAD 1983 HARN for proper compatibility with Google Maps.
2. Export your GIS to a CSV Spreadsheet
Export the attribute table from GIS to a CSV file. Here is an example from Genesee County Metropolitan Planning Commission CSV table.

3. Open Your CSV Spreadsheet
Let’s take a look at the exported CSV table. There are fields already built-in to Community Remarks and fields that are custom to the project.
The following fields are built-in to Community Remarks so we do not need to add them to the database:
-
- Project Id
- Latitude
- Longitude
- Name
- Description
- Length
How do I know what fields are built-in?
Go to the Project tab in the admin, select Import Projects. On this page shown below, there is a link to download the import template. A CSV template will be downloaded from the link. Since we haven’t added our additional fields to the database yet, it will show only the built-in fields in a specific order. This order is very important but we will circle back to that later.
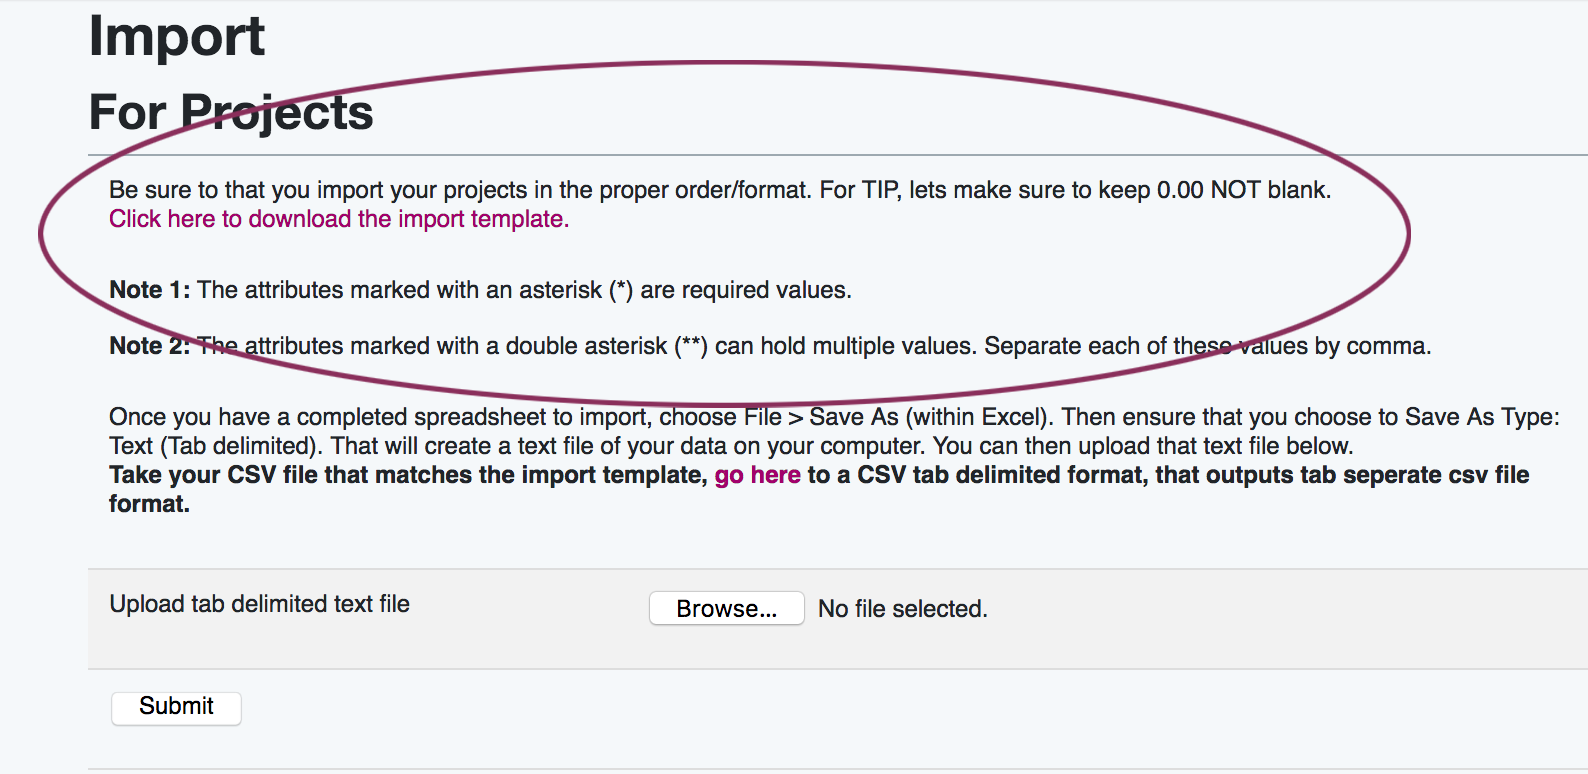
This is what the generic import table looks like:

Most of these fields are optional except the ones delineated with a (*):
- *Project Name: This is the Name of the project
- *Description: Description of the project. For TIP and other related projects, this is the Work Mix
- Version ID: Used rarely, it is for showing projects over time (say 2 different adopted TIPS) or for displaying multiple surveys at once (outside of the scope of this tutorial)
- Path for Print: Used for generating a print-friendly page with a high resolution Google Map on the printed page. Primarily used for TIP, it takes the Lat,Long| format. So a printed polyline would like: 27.4130429987303,-80.3152130386775| 27.41762349390848,-80.31867151772332. This is either inserted by hand or generated on the edit project page. Most don’t need to worry about this field.
- Archived: -blank for no, 1 for yes – If you want to hide this project from the map, put a 1 here.
- Length: Length of the project (usually in miles)
- From: The street where the project begins
- To: Street where the project ends
- Latitude
- Longitude
- ID Number: This is the project number you have assigned
- *Category: The corresponding Project Comment Topic you have created (We will create them in the next step)
- Link: If you have an external link for this project
4. Part A. Custom Database Fields
Next, we will setup our custom fields, then we will setup project topics in Community Remarks.
Under Setup/List Project Attributes, your page might be blank. In the case of the Genesee example, it looks like this:
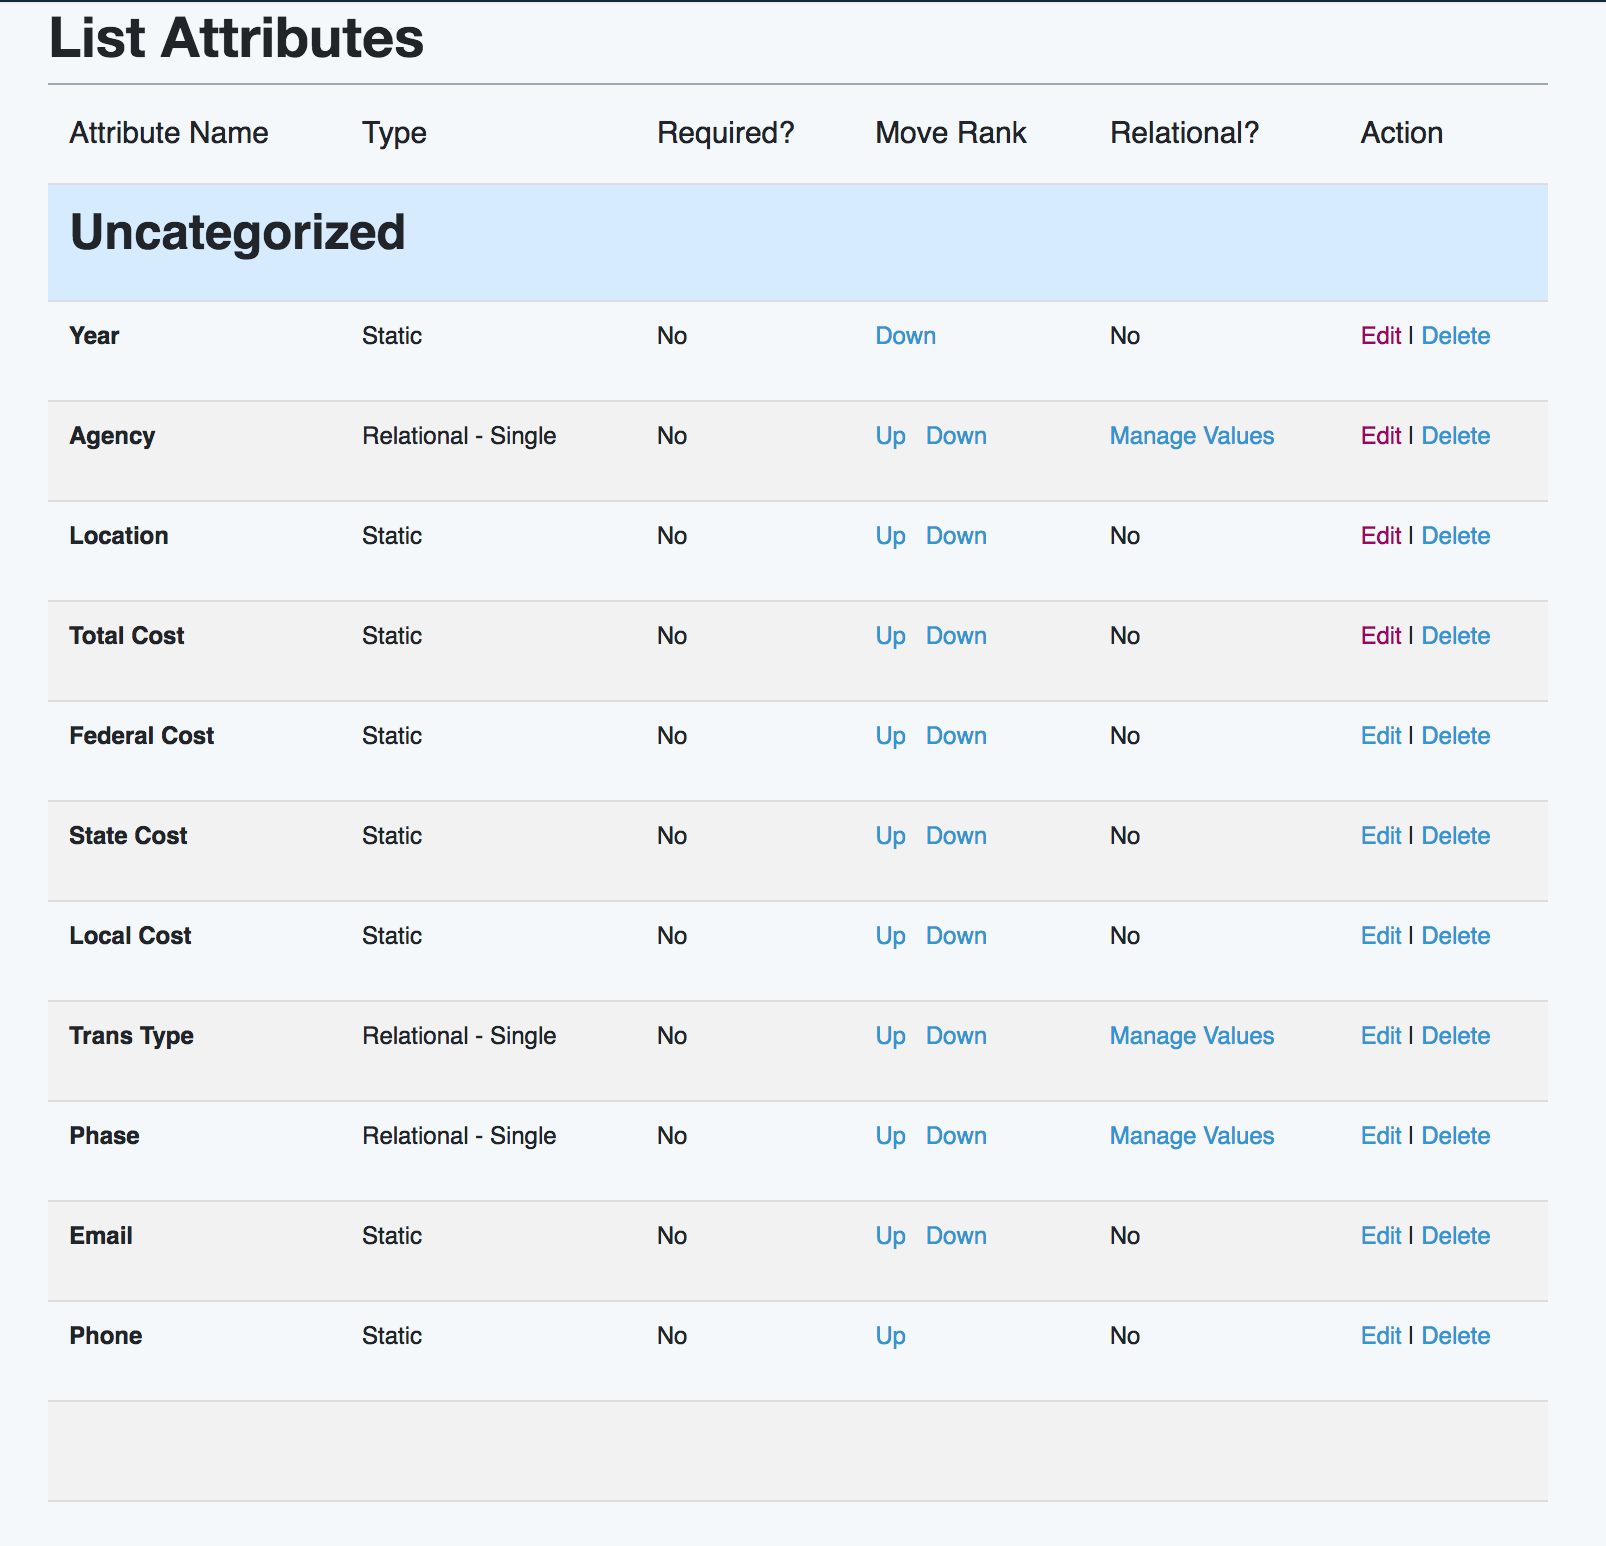
There are 3 types of inputs:
- Static (the field is just text that might not be repeated project to project)
- Relational Single (the field has a one-to-one relationship, other projects might share the same field)
- Relational Multiple (the field has a multiple answers, like a multi check box)
If you don’t have any custom fields entered, then go to Setup/New Project Attribute.
4. Part B Custom Project Topics

Next, you will create Project Topics as opposed to Map Topics. A project topic id, shown here as Topic ID next to the project name will go into your database table before you import it into the database.
5. Match the new template
Remember when we wanted to know what fields are built-in? Then, we went to the Project tab in the admin and selected Import Projects? It’s time to do this again. Now our template spreadsheet should have all the attributes we added into the database in the order we gave the attributes. Download this new CSV template from the link. This is our new template for the column order of the spreadsheet. We need to rearrange our columns in our GIS spreadsheet CSV to match our template.
This is the last step:
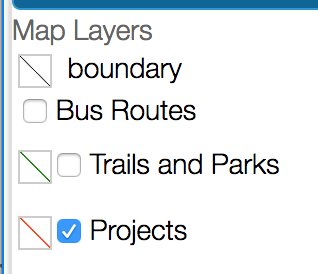 After you have imported your projects into the database, you will want to add geography to the map. Export your geography from GIS as KMZ files, upload them under the KMZ tab. They will appear in the Map Layers legend.